
To upgrade from Devnet to Testnet (Fuji) in the AvaCloud portal, users will share specifics on their L1, from end goals to any special features. This will allow the AvaStudios team to reach out and begin the process of helping transition the L1 from DevNet to Fuji.
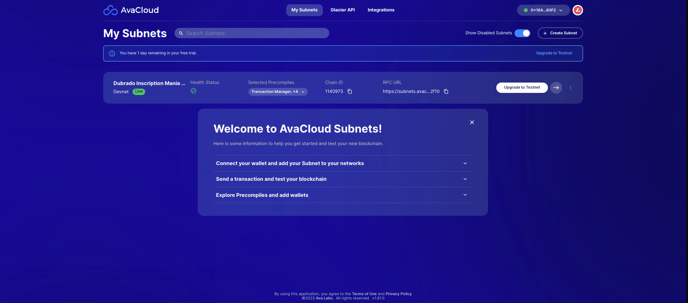
Note: Users can view all their L1s from the “My L1s” tab for an overview of all their L1s.
Promoting the L1 to Testnet
Within the AvaCloud portal, users can promote their L1 to the Fuji Testnet once the team has reviewed the submission.
.png?width=688&height=522&name=image%20(3).png)
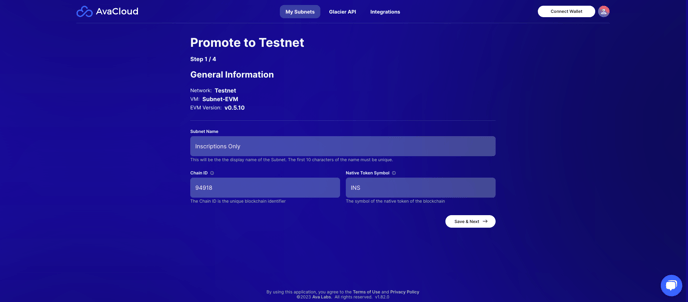
1. Once this phase is completed, users can proceed to upgrade the L1.
-
Enter the L1 Name
-
Chain ID
-
Native Token Symbol.
2. Review the precompiles.

3. Enter the C-Chain addresses to the allowlist to send transactions to the L1. Users can select roles for those addresses such as Admin and User.
NOTE: One admin must be assigned

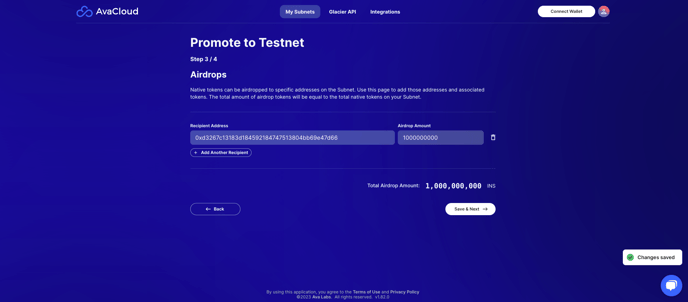
4. Enter any addresses that will be receiving airdrops for native tokens.
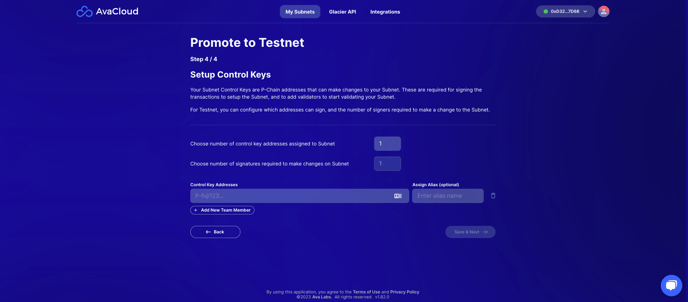
5. Set up Control Keys that can make changes to the L1. Users can choose which control keys can sign and set the threshold of how many signers are required. The best practice is to set up multi-signature controls to make changes to the L1. However, this is only required for mainnet.
NOTE: Multiple control keys and a multi-signature threshold greater than 1 are required for mainnet. They will also require a Ledger device to keep the user's private keys safe.
6. Finally, a Summary screen will appear to review the L1. Once satisfied, click Submit for Review.
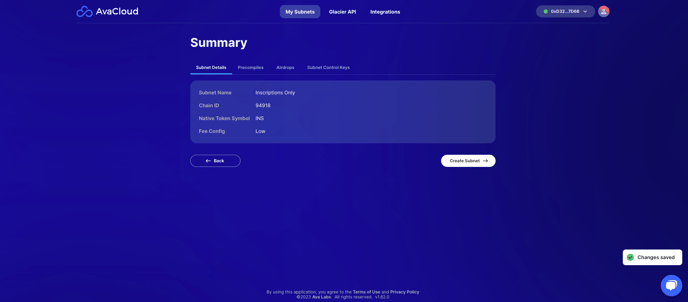
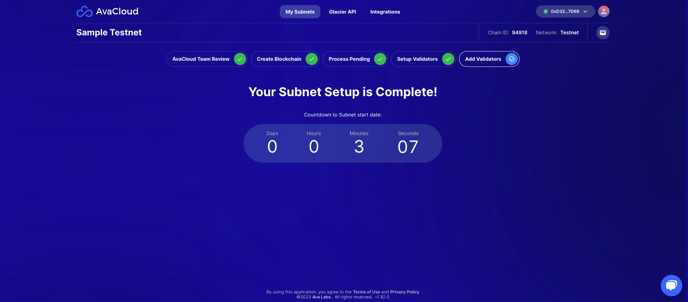
This will result in a notification on the Dashboard showing the status of this submission.

Creating the Blockchain
1. Connect the wallet admin wallet and make sure that it has a minimum of 7.5 AVAX in spendable P-Chain balance to complete the setup. If users do not have any AVAX, they can use the faucet to get some. Users will need to transfer the AVAX from the C-Chain to the P-Chain. This can be done in the wallet tools.

2. Sign for the L1 Transaction and the Creation of the Blockchain.

3. When selecting which signers will sign this transaction a unique link will be generated for each signer. Share the link with people on the list of signers so they can complete the transaction
NOTE: Signing these transactions does not cost AVAX. The user who creates this transaction will need 1 P-Chain Fuji AVAX to submit the transaction through the AvaCloud portal.

Updates to the status of each signer will be shown.

To learn more about how to have team members sign please view the following article.

Adding Validators
1. To finish this process, add validators to the L1.

When using multiple signatures, a status will be shown to provide the status of the signatures.

For any additional questions, please view our other knowledge base articles or contact a support team member via the chat button. Examples are for illustrative purposes only.
Learn More About AvaCloud | Download Case Studies | Schedule an AvaCloud Demo